Showing posts with label How to. Show all posts

Saturday, November 9, 2013

How to get your device to read your iBooks to you in iOS 7


Even people who love reading books all of the time will sometimes get too busy to sit down on the couch and spend a few hours with their nose in their favorite novel. Sometimes, running around, baking cookies, knitting sweaters, and exercising gets in the way of quality reading time.
You could invest money and digital storage space into downloading audio books from iTunes or a third-party digital audio book supplier. Or, you could just get your device to read to you using the iOS accessibility feature, VoiceOver…
Using VoiceOver in iBooks can be a bit tricky. The gestures that you are used to using on your iPhone or iPad don’t work and you have to practice using single, double, or triple tapping with one, two, three, or four fingers to move around in your mobile operating system. We’ve got some simple tips and tricks to help you navigate iBooks with VoiceOver activated so you can have your favorite books read to you while your hands are busy doing other things.
As a reminder, this is one of our more basic tutorials. Many of our readers have already figured out how to activate and use VoiceOver. We don’t pretend to assume that you are all still learning how to use Apple’s Accessibility features. This article is for our new readers. Every day, a new iOS user enters the community and is looking for help to guide them through all of their device’s amazing features. If you already know how to use VoiceOver, please feel free to skip this article and move onto something else. We aren’t having a “slow news day.” We just want to include readers with all different levels of technical expertise.
To have your device read to you, you must first activate Apple’s built in screen reader, VoiceOver. This feature reads aloud anything you touch. To select an item, single tap it. VoiceOver will read what the item is (an app’s name, for example). It will also let you know if you are in landscape or portrait mode and offers a number of different advantages for the sight impaired. Today, we are going to tell you how to turn it on and use it in iBooks.

Turning on VoiceOver


Step 1: Settings > General > Accessibility.
Step 2: Toggle the VoiceOver switch to on.
Step 3: Adjust the speaking rate by dragging the speed range toward the turtle for slower or the rabbit for faster.
Step 4: Tap “Accessibility” at the top of the screen. Then, double-tap it to go back.
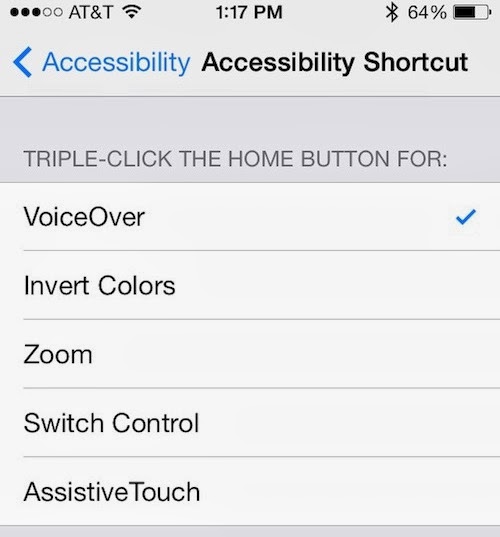
Step 5: Scroll down to “Accessibility Shortcut” using three fingers to scroll.
Step 6: Select Accessibility Shortcut. Then double-tap it.
Step 7: Select VoiceOver. This allows you to triple-click the Home button to turn on and off VoiceOver so you don’t have to keep going back to the Settings app each time.

Using VoiceOver in iBooks


Step 1: Triple-click the Home button to turn off VoiceOver. Until you have had some practice with the feature, you should probably just leave it off. There are a lot of different functions and gestures
Step 2: Go to iBooks > [Book Title] > Bookmark icon or last page you left off reading.
Step 3: Triple-click the Home button to turn on VoiceOver.
Step 4: Single-tap the body of the page (the words of the book) with one finger to select it.
Step 5: Swipe downward with two fingers on the screen to activate VoiceOver.
Once VoiceOver is activated, the words will be read to you and the pages will even turn automatically when the time is right.
To stop the reading, single-tap the screen with two fingers. Triple-click the Home button to turn off VoiceOver.
Now you know how to turn get your device to read to you so that you can free your hands and eyes for more important tasks, like driving or making dinner.
Have you ever used the VoiceOver feature on your iPhone or iPad? Do you use it to read books to you?

Sunday, November 3, 2013

How to set a song as your alarm sound in iOS 7


There may be a number of great alarm clock apps in the App Store, but thanks to Apple’s recent iOS 7 update, the native clock app looks good and works great. So, if you want to give the native alarm option a try, you may find that it is the only app you need to wake you up in the morning.
Apple also added a plethora of new chimes and tones to keep your ears interested. But if you are tired of “Night Owl” and “By the Seaside” you will be happy to know that you can add your own music as the alarm sound…
As a reminder, we know that this feature was available in iOS 6 and is not new. We realize that many of our readers have already been using their iTunes music as their alarm sounds. This article is for new iPhone owners who don’t necessarily know everything about their device yet. If you already know how to set music as an alarm, please feel free to move on to another one of our articles that interest you more.
Using your own music as an alarm sound is a lot easier than you might think. Apple makes it fairly easy to find, if you know where to look for it.

Editing a current alarm

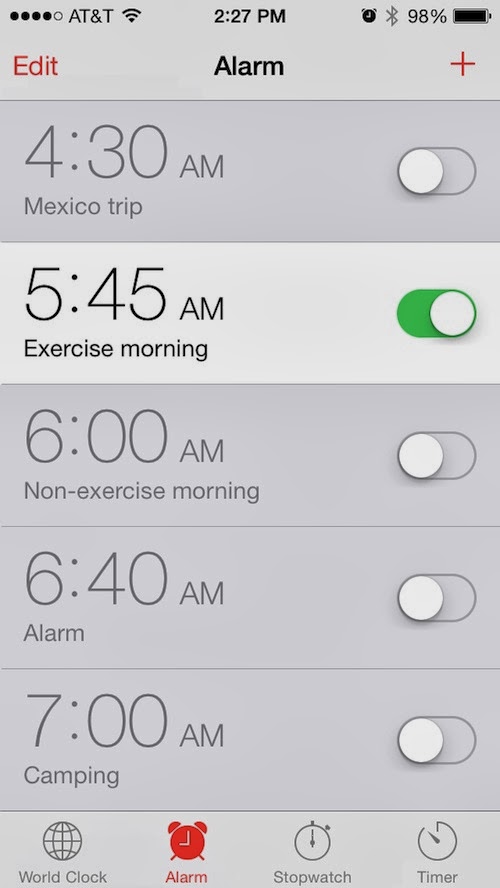
How to set a song as alarm sound 4Step 1: Open the Clock app.
Step 2: Select “Alarm” from the icons at the bottom.
Step 3: Tap the “Edit” button in the top left corner of the screen.
Step 4: Select the alarm you wish to use a song for.
Step 5: Tap “Sound”
Step 6: Under “Songs” tap, “Pick a Song.”
Step 7: Select a song from your device’s music library.

Setting a new alarm

How to set a song as alarm sound 5Step 1: Open the Clock app.
Step 2: Select “Alarm” from the icons at the bottom.
Step 3: Tap the plus (+) button in the top right corner of the screen.
Step 4: Set the time, recurrence, and label.
Step 5: Tap “Sound.”
Step 6: Under “Songs” tap, “Pick a Song.”
Step 7: Select a song from your device’s music library.
Now you will be able to set a different song for every day of the week if you want to have a little variety in your life.

Saturday, November 2, 2013

How to access the list view in iOS 7 Calendar app


Sometimes there are some features you take for granted. Take the list view in the Calendar app for example. In iOS 6, it was pretty straightforward. You had three tabs at the bottom of the app for List, Day, and Month views. So simple, my mom could figure it out.
With the iOS 7 redesign though, some things got more complicated, or at the very least less obvious. The same list view feature that was so obvious in iOS 6 suddenly became a little more subtle. In fact, it became so subtle that some people are confused as to where it went, my mom included…
I figured that if that was confusing for a few users, it might be worth publishing a post about it, because clearly my mom and the handful of readers’ emails we received about that can’t just be isolated cases. As a matter of fact, if you use the stock Calendar app, I’m sure you’ve asked yourself the question at least once before: “where is the list view in the iOS 7 Calendar app?”
Today, I answer this question.
Of course, if you already know the answer, please spare us the “slow news day?” and “I’ve known this for months” types of comments. If you already know this, good for you. There is no need to bring down people who don’t, including my mom, or iDB for sharing simple tips about iOS 7.
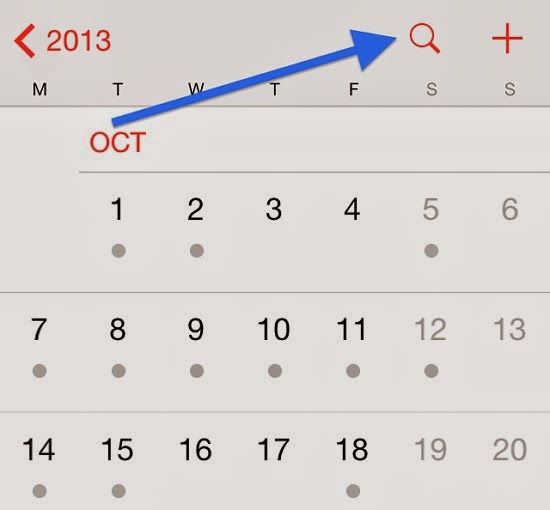
So, where is the list view in the new Calendar app? Is it gone? No, it’s just right here hiding in plain sight, except its icon isn’t the one you’re probably looking for.

Whether you are in the year, month or day view, you can tap the magnifying glass icon at any time to be taken to the list view. As I said, it’s definitely not as obvious now. To me, the magnifying glass icon is synonymous of “search,” not necessarily of list view. Note that once you are in list view, you can easily search for any event in your calendar by using the search box at the top.
A simple tip indeed, but definitely one that will help my mom and maybe yours get the best of iOS 7.

Saturday, October 26, 2013

How to get rid of the blur effects in iOS 7

Blur Contrast iOS 7 Control Center
Some of you might already be offended just by reading the title of this post. How dare we share tips on how to remove the blur effects in iOS 7? How can we, in just one post, put an end to something that some might consider the essence of iOS 7? Something that the design team at Apple spent months and months working on. Well, we like options and we also like for you to know that you have options.
The main reason why you’d want to disable the blur effects in iOS 7 is to improve contrast on some backgrounds in order to improve legibility. If you have vision problems, removing blur effects might indeed help you see what’s on your screen better.
Of course, you might also not be too fond of the blur effects to begin with, and this is a good reason to get rid of them. For the record, I find those blur effects to be essential to the iOS 7 experience so I didn’t disable them on my own device.
In order to remove blur effects in iOS 7, go to Settings > General > Accessibility > Increase Contrast > On.
Blur Contrast iOS 7 Notification Center
As far as I can tell, the only spots where blur effects are present – and thus where they can be disabled – are in Notification Center and in Control Center. If there are other areas of the UI where blur can be found, I’m sure you will be quick to point it out in the comments.
As you can see from the images above, the changes aren’t dramatic but they are very much noticeable. Control Center will lose its blurry effect for a plain gray background, while Notification Center will gain a black background. I have to say the black background of Notification Center does look pretty slick, but of course, it’s all personal preferences.
What do you think? Are blurry backgrounds enough of an annoyance for you to get rid of them?